Window tinting is a practical and aesthetic solution for many homeowners, vehicle owners, and businesses. Over time, however, old or damaged window films can deteriorate, becoming unsightly or less effective. Removing these films requires precision, care, and techniques to avoid damaging the underlying surfaces. This guide will walk you through the best practices for safe tint removal, ensuring a seamless and damage-free process.
Why Remove Old or Damaged Window Tints?
1. Aesthetic Concerns
Old window films often bubble, fade, or discolor, affecting the overall appearance of your windows. Removing damaged tint restores clarity and enhances the look of your home, office, or vehicle.
2. Reduced Functionality
Aged tints may lose their ability to block UV rays or regulate heat effectively. Replacing them can restore the benefits of modern window films.
3. Safety and Visibility
Deteriorated tints can hinder visibility in vehicles, especially at night or in adverse weather conditions. Timely removal ensures safety on the road.
Essential Tools for Tint Removal
Before starting the removal process, gather the following tools and materials to ensure efficiency:
- Heat Gun or Hair Dryer: Helps loosen adhesive by softening it.
- Razor Blade or Scraper: For peeling and scraping off the tint without damaging the glass.
- Spray Bottle with Soap Solution: A mix of water and dish soap to lubricate the surface.
- Microfiber Cloths: For cleaning and drying the glass.
- Adhesive Remover or Rubbing Alcohol: To eliminate residue left by the tint adhesive.
- Protective Gear: Gloves and goggles for safety.
Step-by-Step Guide to Safe Tint Removal
1. Prepare the Area
Ensure the workspace is clean and well-ventilated. Protect surrounding areas with drop cloths or painter’s tape, such as window frames or car interiors.
2. Loosen the Tint Film with Heat
Using a heat gun or hair dryer, warm the surface of the tint. Hold the heat source a few inches away from the film to avoid overheating. Move it in slow, circular motions to evenly heat the adhesive beneath the tint.
3. Peel the Film Gently
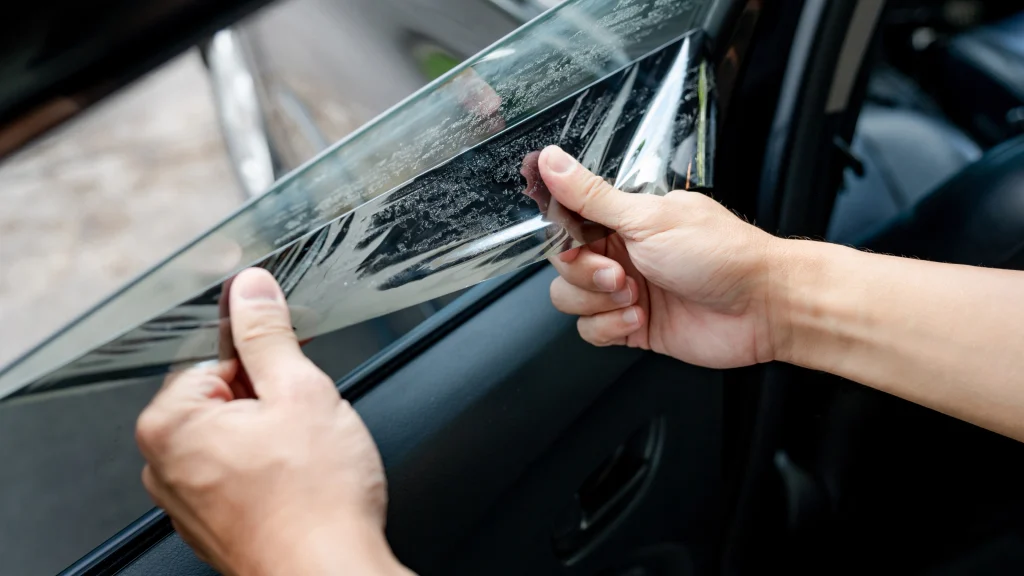
Starting from a corner, use a razor blade or scraper to lift the edge of the film. Once you have a grip, pull the tint slowly and steadily at a 45-degree angle to minimize tearing.
4. Address Stubborn Areas
For sections where the tint won’t budge, reapply heat or spritz the area with a soap solution to loosen the adhesive further.
5. Remove Adhesive Residue
After peeling off the tint, you may notice adhesive left behind. Spray the glass with adhesive remover or rubbing alcohol and let it sit for a few minutes. Use a scraper or microfiber cloth to wipe away the residue.
6. Clean the Glass
Finish by cleaning the glass thoroughly with a soap solution and drying it with a microfiber cloth. This step ensures the surface is pristine and ready for a new tint if desired.
Tips for Safe and Effective Tint Removal
Use Gentle Pressure
Avoid pressing too hard with tools, as excessive force can scratch the glass or damage surrounding areas.
Work in Sections
Tackling one small area at a time ensures better control and minimizes the risk of errors.
Test Adhesive Removers
Before applying adhesive remover to the entire surface, test it on a small, inconspicuous area to ensure it doesn’t damage the glass or surrounding materials.
Seek Professional Assistance
If you’re unsure about the process or dealing with delicate surfaces, consider hiring a professional tint removal service. Experts have the experience and tools to ensure a flawless outcome.
Common Mistakes to Avoid
Skipping Heat Application
Trying to peel off the tint without loosening the adhesive can lead to tearing or leaving excessive residue.
Using Harsh Chemicals
Avoid strong solvents that could damage the glass, tinting surface, or nearby materials.
Neglecting Safety
Always wear protective gloves and goggles to shield yourself from sharp tools and chemical splashes.
When to Replace Window Tints
Once the old tint is removed, you can replace it with a high-quality film with improved UV protection, privacy, and energy efficiency. Modern window tints come in various shades and materials to suit your needs.
Benefits of Professional Tint Removal
Hiring a professional service ensures:
- Precision: Experts use specialized tools and techniques to remove tint without causing damage.
- Efficiency: Professionals can complete the job quickly and thoroughly.
- Convenience: Save yourself the hassle and potential risks of DIY removal.
By following these best practices for safe tint removal, you can restore the appearance and functionality of your windows while protecting the underlying glass. Whether you tackle the task yourself or hire professionals, a well-executed removal process lays the foundation for a fresh start with modern window films.
